Connecting a Laravel application to AWS IoT Core over MQTT - Part 2

In Part 1, we created a device policy and a thing on AWS IoT core. In this article, we will use the downloaded certificates to connect to the MQTT broker to publish messages and subscribe to topics. We will use the PHP-MQTT library.
AWS IoT core uses MQTT over TLS. This ensures encrypted data is sent between your devices or applications and the cloud. We need to use the certificates to establish the TLS connection. If you look in the config file of the library, you will find the following lines
// The TLS settings used for the connection. Must match the specified port.
'tls' => [
    'enabled' => env('MQTT_TLS_ENABLED', false),
    'allow_self_signed_certificate' => env('MQTT_TLS_ALLOW_SELF_SIGNED_CERT', false),
    'verify_peer' => env('MQTT_TLS_VERIFY_PEER', true),
    'verify_peer_name' => env('MQTT_TLS_VERIFY_PEER_NAME', true),
    'ca_file' => env('MQTT_TLS_CA_FILE'),
    'ca_path' => env('MQTT_TLS_CA_PATH'),
    'client_certificate_file' => env('MQTT_TLS_CLIENT_CERT_FILE'),
    'client_certificate_key_file' => env('MQTT_TLS_CLIENT_CERT_KEY_FILE'),
    'client_certificate_key_passphrase' => env('MQTT_TLS_CLIENT_CERT_KEY_PASSPHRASE'),
],
We must provide the path to the certificates so the library can use them when connecting to the cloud. The certificates should be stored in a directory where your application has read access. Also, do not commit the certificates to your repository as it can pose a security risk. You should upload them to the server manually or add a step to your CI to upload the certificates to your servers. Add the following lines to your .env file.
MQTT_TLS_ENABLED=true
MQTT_TLS_CA_FILE=/path-to/AmazonRootCA1.pem
MQTT_TLS_CLIENT_CERT_FILE=/path-to/device_monitor.pem.crt
MQTT_TLS_CLIENT_CERT_KEY_FILE=/path-to/device_monitor-private.pem.key
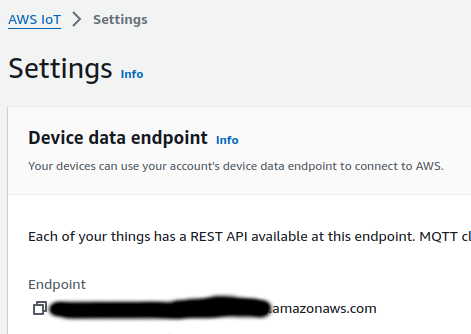
We also need to know the host and the port of the MQTT broker. Navigate to AWS IoT > Settings page to find the MQTT host for your account.
There are multiple ways to connect to IoT Core as shown in the table below. Since we are using X.509 client certificate and MQTT, we will use port 8883
| Protocol | Operations supported | Authentication | Port | ALPN protocol name |
| MQTT over WebSocket | Publish, Subscribe | Signature Version 4 | 443 | N/A |
| MQTT over WebSocket | Publish, Subscribe | Custom authentication | 443 | N/A |
| MQTT | Publish, Subscribe | X.509 client certificate | 443† | x-amzn-mqtt-ca |
| MQTT | Publish, Subscribe | X.509 client certificate | 8883 | N/A |
| MQTT | Publish, Subscribe | Custom authentication | 443† | mqtt |
| HTTPS | Publish only | Signature Version 4 | 443 | N/A |
| HTTPS | Publish only | X.509 client certificate | 443† | x-amzn-http-ca |
| HTTPS | Publish only | X.509 client certificate | 8443 | N/A |
| HTTPS | Publish only | Custom authentication | 443 | N/A |
The table was taken from https://docs.aws.amazon.com/iot/latest/developerguide/protocols.html
We also specified in the device policy that the client ID should be the same as the thing name. The following lines should be added to the .env file
MQTT_HOST=xxxxxxxxxxxxxxxxxxxxx.amazonaws.com
MQTT_PORT=8883
MQTT_CLIENT_ID=device_monitor
Subscribing to a topic
We can use the code from my previous article to subscribe to a topic. We can only subscribe to topics that were defined in the policy. IoT core will close the connection if we attempt to subscribe to topics, not in the device policy.
<?php
namespace App\Console\Commands;
use Illuminate\Console\Command;
use PhpMqtt\Client\Facades\MQTT;
class SubscribeToTopic extends Command
{
/**
* The name and signature of the console command.
*
* @var string
*/
protected $signature = 'mqtt:subscribe';
/**
* The console command description.
*
* @var string
*/
protected $description = 'Subscribe To MQTT topic';
/**
* Execute the console command.
*
* @return int
*/
public function handle()
{
$mqtt = MQTT::connection();
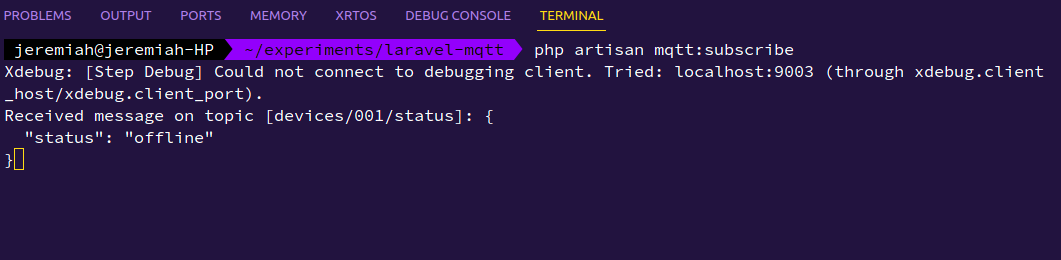
$mqtt->subscribe('devices/+/status', function(string $topic, string $message) {
echo sprintf('Received message on topic [%s]: %s',$topic, $message);
});
$mqtt->loop(true);
return Command::SUCCESS;
}
}
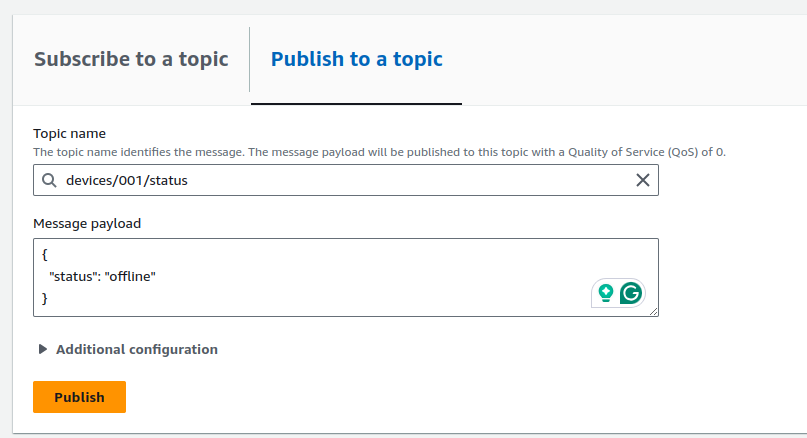
Run the php artisan mqtt:subscribe command in your terminal then, navigate to AWS IoT > MQTT test client and click on the Publish to a topic tab. Use devices/001/status for the topic, enter any message you want as the payload and click the publish button.
Publishing a message
Let's create a command to query the devices for their status
<?php

namespace App\Console\Commands;

use Illuminate\Console\Command;
use PhpMqtt\Client\Facades\MQTT;

class QueryStatus extends Command
{
    /**
     * The name and signature of the console command.
     *
     * @var string
     */
    protected $signature = 'mqtt:query-status';

    /**
     * The console command description.
     *
     * @var string
     */
    protected $description = 'Query device status';

    /**
     * Execute the console command.
     */
    public function handle()
    {
        $command = [
            'cmd' => 'status'
        ];

        $mqtt = MQTT::connection();

        $mqtt->publish(
            'devices/002/query',
            json_encode($command)
        );
    }
}
To test this, navigate to AWS IoT > MQTT test client and click the Subscribe to a topic tab. Subscribe to the topic devices/+/query and run php artisan mqtt:query-status in your terminal.
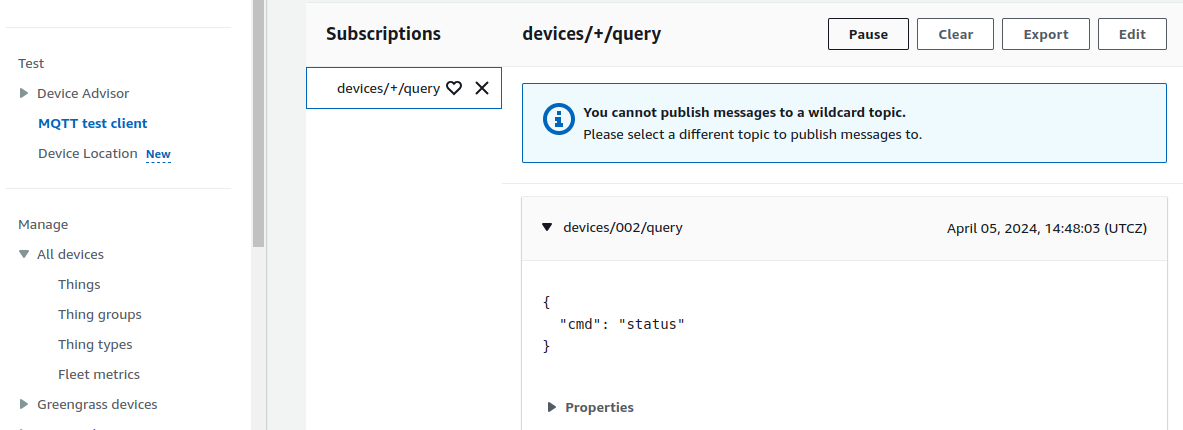
Note that, publishing to a topic not in the policy will cause IoT core to terminate the connection.